Cleaning and showcasing a deer skull can be an intriguing way to pay tribute to your hunting background and highlight the natural charm of these distinctive treasures. Were you aware that around 10 million deer are harvested annually in the United States? With such a high number of deer being hunted, there is a chance to turn the skulls into impressive displays that encapsulate the spirit of the animal and your hunting journey.
Key Takeaways:
- Cleaning and displaying deer skulls is a captivating way to celebrate hunting heritage.
- Each year, approximately 10 million deer are harvested in the United States.
- Transforming deer skulls into visually appealing displays captures the beauty of these unique treasures.
- With the right techniques and tools, cleaning and preserving deer skulls can be relatively easy and rewarding.
- Choose between euro mount and shoulder mount options based on personal preference and desired aesthetic.
Methods for Cleaning Deer Skulls
When it comes to effectively cleaning deer skulls, there are various methods you can utilize. The choice of method depends on the resources available and the desired outcome. The three most common methods are using beetles, simmering, or boiling.
1. Beetle Cleaning Method
If you have access to beetles, this can be an efficient and natural way to clean deer skulls. Beetles have an incredible ability to eat away the soft tissue while leaving the bone intact. You can either purchase beetles or have them breed naturally if you have a beetle colony. The beetles will meticulously clean the skull, ensuring a thorough job.
2. Simmering Method
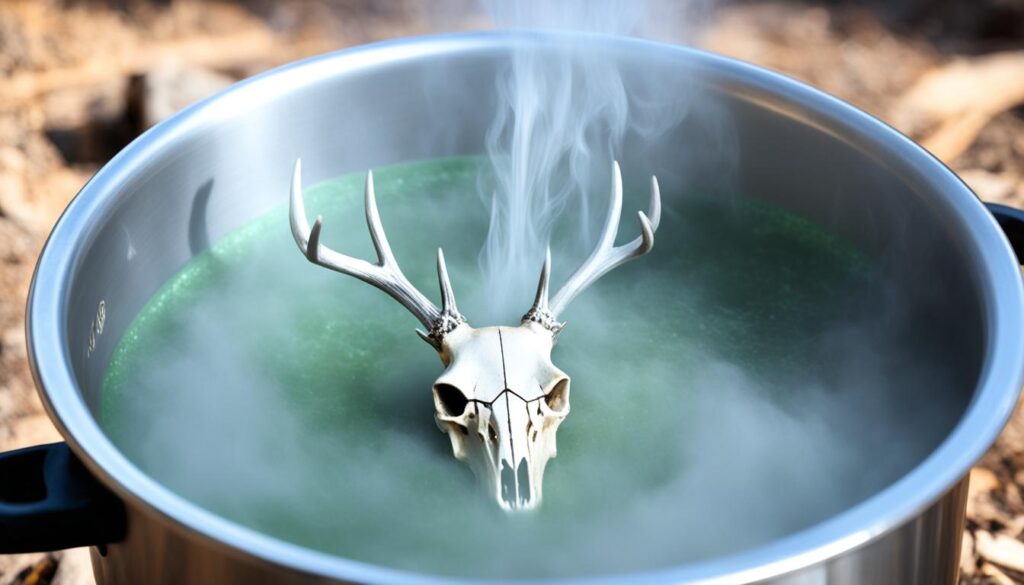
Simmering the deer skull in water is another popular technique for cleaning. It involves submerging the skull in a pot of water and heating it below the boiling point. Simmering softens the tissue, making it easier to remove. This method is effective, especially for smaller skulls, and can be done with common household items.
3. Boiling Method (Not Recommended)
While boiling may seem like a viable option, it is generally not recommended for cleaning deer skulls. Boiling can make the bones brittle and susceptible to breakage. This method is best avoided unless you don’t have access to beetles or simmering equipment.
To ensure a clean and well-preserved deer skull, it is crucial to remove all soft tissue thoroughly, regardless of the cleaning method chosen. This will prevent odors and decay and help maintain the integrity of the skull.
Simmering Method for Cleaning Deer Skulls
The simmering method is a popular and effective way to clean deer skulls and prepare them for display. It involves gently simmering the skull in water, allowing the heat to loosen and dissolve the remaining tissue. This method is particularly suitable for smaller skulls, such as those from deer, but can also be used for larger skulls like wolves or bears with slightly longer simmering times.
Here are the steps to clean deer skulls using the simmering method:
- Fill a large pot with water and place the deer skull inside, ensuring it is completely submerged.
- Heat the pot on a stovetop or outdoor burner and bring the water to a gentle simmer. The ideal temperature is around 160 degrees Fahrenheit.
- Allow the skull to simmer for approximately 40 to 60 minutes. Larger skulls might require slightly longer simmering times.
- During the simmering process, the heat will help dissolve the remaining tissue, making it easier to remove.
- After simmering, carefully remove the skull from the pot using tongs or heat-resistant gloves. Be cautious, as the skull may be hot.
- Using a small knife or tweezers, gently scrape away any remaining tissue or flesh from the skull. Take your time and be thorough in this step.
Remember, it’s crucial not to over boil the skull or simmer it for too long, as excessive heat can damage the teeth and bone. Pay close attention to the simmering process and monitor the temperature to ensure optimal cleaning results.

Boiling Method for Cleaning Deer Skulls
The boiling method is another option for cleaning deer skulls, but caution must be exercised to prevent damage to the bones. When using this method, it is important to boil the skull at a temperature lower than the boiling point, typically around 160 degrees Fahrenheit. Extended boiling times should be avoided as they can make the bones brittle and susceptible to breaking. Additionally, it is advisable to carry out the boiling process outside or in a well-ventilated area to mitigate any potential odor.

While boiling can be an effective technique for cleaning deer skulls, it requires careful attention to temperature and duration. Following the correct boiling method can help ensure a successful cleaning process without compromising the structural integrity of the bones.
Euro Mount vs. Shoulder Mount
When it comes to displaying a deer skull, there are two popular options: a euro mount and a shoulder mount.
A euro mount involves cleaning and preserving the skull while leaving the antlers intact. This method is simpler and more cost-effective compared to a shoulder mount (Image 1). With a euro mount, the focus is on showcasing the intricate bone structure and natural beauty of the skull itself.

The euro mount is a minimalist approach that highlights the characteristics of the deer skull, making it a popular choice among hunters and nature enthusiasts.
On the other hand, a shoulder mount involves preserving the entire head and hide of the deer, creating a more lifelike display. This option is often chosen when the desire is to capture the essence and appearance of the deer in its natural habitat. The shoulder mount brings together the skull, antlers, and the deer’s fur and features, offering a more comprehensive representation of the animal (Image 2).

The shoulder mount provides a striking visual impact, offering a sense of realism and a connection to the hunting experience.
Ultimately, the choice between a euro mount and a shoulder mount depends on personal preference and the desired aesthetic. Some individuals may prefer the simplicity and elegance of a euro mount, while others opt for the immersive and lifelike display offered by a shoulder mount.
Key Points:
- A euro mount involves cleaning and preserving the deer skull while leaving the antlers intact.
- A shoulder mount preserves the entire head and hide of the deer, providing a more lifelike display.
- The euro mount is simpler and more cost-effective, focusing on the beauty of the skull.
- A shoulder mount offers a comprehensive representation of the deer, showcasing the skull, antlers, and fur.
Materials and Steps for Cleaning a Deer Skull at Home
Cleaning a deer skull at home can be a rewarding project that allows you to preserve and display your hunting trophy. With a few essential materials and following a simple step-by-step process, you can achieve a clean and well-prepared deer skull for your collection.
Materials Needed:
- A large pot
- A gas burner
- Salt
- Bicarbonate soda
- Dishwashing detergent
- Pressure washer
- Super glue
Now that you have gathered the necessary materials, let’s walk through the steps to clean a deer skull at home:
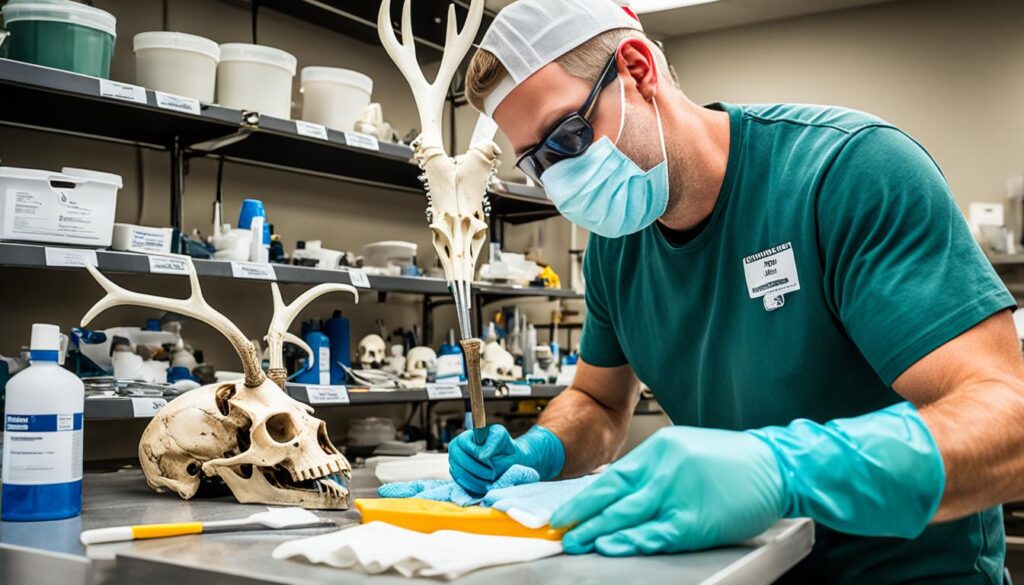
- First, remove as much flesh and tissue as possible from the skull. You can do this by carefully scraping it off with a knife or using tweezers. Be patient and thorough in this step to ensure a clean result.
- Next, fill a large pot with water and add a generous amount of salt and dishwashing detergent. Place the pot on a gas burner and bring the water to a simmer. Submerge the skull in the simmering water and let it cook for several hours. This will help further remove any remaining tissue and sanitize the skull.
- After simmering, remove the skull from the pot and rinse it thoroughly with water. At this point, you can inspect the skull and continue removing any remaining tissue or debris.
- Prepare another simmering solution by combining water, salt, bicarbonate soda, and dishwashing detergent. Place the skull back into the pot and simmer for an additional hour. This step helps to whiten and clarify the bones.
- Once the second simmering is complete, remove the skull from the pot and rinse it again with clean water. Use a pressure washer to carefully remove any lingering tissue or particles from hard-to-reach areas.
- If you notice any loose bones or antlers, use super glue to reattach them securely. Allow the skull to dry completely before proceeding.

By following these steps and using the right materials, you can effectively clean a deer skull at home and prepare it for display or mounting. Remember to exercise caution when handling sharp tools and to work in a well-ventilated area. Enjoy the process and showcase your hunting achievements with pride!
Tips for Bleaching and Preserving a Deer Skull
After successfully cleaning a deer skull, the next step is to bleach and preserve it to enhance its appearance and ensure its long-term durability. The bleaching process can help achieve a desirable whiteness, while preservation techniques ensure that the skull remains in optimal condition for display or study. Here are some tips to guide you:
- Use hydrogen peroxide for bleaching: One effective method to bleach a deer skull is by using hydrogen peroxide with a concentration of 5-10%. This versatile substance helps remove any remaining stains and gives the skull a bright, clean appearance.
- Place the skull in a bowl of hydrogen peroxide: Once your deer skull is cleaned and cooled, submerge it in a bowl of hydrogen peroxide. Ensure that the liquid covers the entire skull, including the antlers if applicable.
- Allow the skull to whiten to your desired level: Leave the skull in the hydrogen peroxide solution until it reaches the desired whiteness. Keep in mind that the bleaching process may take several hours or even days, depending on the starting color and the desired result.
- Rinse the skull thoroughly: Once the desired whiteness is achieved, remove the skull from the hydrogen peroxide solution and rinse it thoroughly with water. This step is essential to halt the bleaching process and prevent any further reaction between the peroxide and the bone.
- Repair any loose bones with wood glue: If you notice any loose or damaged bones during the bleaching process, carefully apply wood glue to reattach them. This will help strengthen the overall structure of the skull and ensure its longevity.
- Store the skull in a cool and dry place: To preserve the deer skull for long-term display, it’s important to keep it in a cool, dry environment. This will protect it from humidity, dust, and potential damage.
Note: When working with hydrogen peroxide, it’s crucial to wear protective gloves and work in a well-ventilated area. Avoid contact with eyes, skin, or clothing, and follow the recommended safety guidelines.
By following these tips, you can successfully bleach and preserve a deer skull, enhancing its aesthetic appeal and ensuring its longevity as a captivating display piece. Remember to exercise caution and prioritize safety throughout the process.

Legalities and Ethical Considerations for Deer Skull Collection
When collecting deer skulls or any other animal parts, it’s crucial to be aware of legal regulations and ethical considerations. It’s important to respect laws and regulations that protect wildlife and ensure the responsible collection of animal remains. This section will outline the legal and ethical aspects that should be considered when collecting and displaying deer skulls.
Legal Regulations
State and federal laws may govern the collection and possession of deer skulls and other animal parts. It’s essential to research and understand these laws to avoid any legal violations. Some species may be protected, and it could be illegal to possess their parts without appropriate permits. Local authorities or wildlife agencies can provide information about specific regulations and permits required for deer skull collection.
Ethical Considerations
It’s crucial to approach deer skull collection with ethical considerations in mind. Killing animals solely for their skulls is discouraged and can be considered wanton waste. Responsible hunters understand the importance of valuing the entire animal, not just specific parts. Deer skulls collected for display or study should ideally be obtained from legal hunting activities or as a result of natural mortality.
“Responsible collection and display of deer skulls involve respecting wildlife, hunting regulations, and ethical principles.”
By following both legal regulations and ethical considerations, collectors can ensure that their deer skull collection is responsible, sustainable, and respectful towards wildlife and the natural environment.
Image:

Precautions and Safety Measures for Cleaning Deer Skulls
When it comes to cleaning deer skulls, it’s important to prioritize safety precautions to ensure a safe and effective process. By taking the necessary measures, you can protect yourself and handle the skulls with care. Here are some essential safety tips:
1. Use Protective Gloves
Always wear protective gloves when cleaning deer skulls, especially when dealing with carnivore skulls that may carry diseases like rabies. Gloves provide a barrier between your skin and potential pathogens, ensuring your safety.
2. Avoid Extended Simmering or Boiling
Extended simmering or boiling times can make the bones of deer skulls brittle and prone to breakage. To preserve the integrity of the bones, it’s crucial to follow the recommended simmering or boiling durations. Be mindful of the specific instructions for the cleaning method you choose.
3. Ensure Proper Ventilation
When boiling or simmering deer skulls, odors may be released, which can be unpleasant. It’s important to carry out these processes in a well-ventilated area or outdoors to prevent any buildup of strong smells. Good ventilation helps maintain a safe and comfortable environment.
4. Follow Safety Guidelines
Always adhere to safety guidelines provided by experts or professionals when cleaning deer skulls. These guidelines may include specific recommendations regarding tools, techniques, and precautions. Following them ensures that you minimize risks and achieve the desired results safely.
By implementing these precautions and safety measures, you can protect yourself from potential hazards and ensure a safe and successful deer skull cleaning process.

| Safety Precautions | Benefits |
|---|---|
| Wearing protective gloves | – Protects against potential diseases – Ensures personal safety |
| Avoiding extended simmering or boiling | – Preserves bone integrity – Prevents brittleness and breakage |
| Ensuring proper ventilation | – Minimizes unpleasant odors – Provides a safe environment |
| Following safety guidelines | – Reduces risks – Ensures effective cleaning |
Conclusion
Wrapping up, cleaning and displaying a deer skull is not only a way to honor your hunting heritage but also a fascinating and educational experience. By following the right methods, using the appropriate tools, and taking necessary safety precautions, you can effectively clean and preserve deer skulls for long-term display.
Whether you choose a euro mount or a shoulder mount, the natural beauty of the skull can be showcased with pride. The euro mount offers a simpler and more cost-effective option, preserving the skull while leaving the antlers intact. On the other hand, a shoulder mount creates a more lifelike display by preserving the entire head and hide of the deer.
Throughout the process, it’s important to remember to adhere to legal regulations and ethical considerations when collecting deer skulls. Different species may be protected by state and federal laws, so it’s crucial to ensure that your collection is legal. Additionally, always prioritize safety by wearing gloves when handling carnivore skulls and following proper ventilation practices during boiling or simmering.
By honoring your hunting heritage, displaying deer skulls with care, and adhering to legal and safety guidelines, you can create a lasting tribute to these majestic animals. The clean and preserved deer skulls will serve as a reminder of their unique features and the memories associated with your hunting experiences.


