To create your own dog training treats, gather ingredients such as canned salmon, oat flour, eggs, raw beef or chicken liver, whole wheat flour, egg, and water. Preheat your oven to 350°F, then mix the ingredients together accurately to form the dough. Make sure to knead and shape the dough properly before baking until golden brown for the desired texture. For shaping, use cookie cutters or roll the dough into balls for variety that will appeal to your dog’s senses. Store the treats in airtight containers, labeling them with names and dates to maintain freshness. Homemade treats provide quality and freshness, enhancing your training sessions and producing great results!
Key Takeaways
- Choose nutritious ingredients like canned salmon, liver, and pumpkin for health benefits.
- Preheat oven to 350°F, combine ingredients accurately, and bake until golden brown for perfect treats.
- Shape treats with cookie cutters or roll into balls for variety and appeal.
- Store in airtight containers, label with dates, and rotate for freshness.
- Use homemade treats for training to enhance engagement and improve the training experience.

Set of 5, Silicone Molds Puppy Dog Paw & Bone Shaped 2 in 1 and Stainless Steel Bone Cookie Cutter,for Homemade Treats and Cat Animal Paw Ice Candy Chocolate Baking Mold (Blue&Pink)
- Material: Durable stainless steel and food-grade silicone
- Cookie Cutter Dimensions: Various sizes up to 5.1 inches
- Set Contents: 3 bone cutters and 2 silicone molds
As an affiliate, we earn on qualifying purchases.
As an affiliate, we earn on qualifying purchases.
Ingredients for Homemade Dog Training Treats
When making homemade dog training treats, you can use a variety of nutritious ingredients such as canned salmon, oat flour, and eggs. Another great combination is raw beef or chicken liver mixed with whole wheat flour, egg, and water to create treats rich in essential nutrients.
For a different twist, try incorporating a cup of unsweetened pumpkin puree into your recipe. This ingredient not only adds flavor but also provides a good source of fiber and vitamins for your furry friend. Additionally, shredded coconut can be a tasty and healthy addition to your treats, offering a hint of sweetness without any added sugars.
Preheat the Oven

For consistent baking and best results for your homemade dog training treats, preheat the oven to 350°F as recommended. Preheating the oven to the correct temperature is vital to guarantee that your treats bake evenly and thoroughly. This step establishes the foundation for a successful baking process, allowing the ingredients to transform into delicious treats for your furry friend.
To help you understand the importance of preheating the oven, here is a table highlighting the key reasons why this step is essential for baking homemade dog treats:
| Reasons to Preheat the Oven |
|---|
| Ensures even baking |
| Maintains baking environment |
| Achieves desired texture |
| Promotes consistent results |
| Allows proper cooking |
Combine the Ingredients
After preheating the oven to 350°F, gather the ingredients listed in the facts section to begin combining them in a mixing bowl for your chosen homemade dog training treat recipe.
Here are some tips to help you create the perfect training treats for your furry friend:
- Measure the ingredients accurately to guarantee the right consistency in your dog treats recipe.
- Use a standard measuring cup to precisely portion the wet ingredients like eggs, pumpkin puree, and peanut butter.
- Mix the ingredients thoroughly to form a well-combined dough that will hold its shape on the baking sheet.
- Remember to preheat your baking sheet before placing the treats on it to ensure even baking.
Once you have combined all the ingredients in the mixing bowl, you're ready to move on to the next step of shaping the dough. Stay tuned for the following section on 'Knead the Dough' to continue your journey in making delicious homemade treats for your pup.
Knead the Dough

To make your homemade dog training treats, it's essential to knead the dough properly. This step helps the gluten develop, giving your treats that chewy texture dogs love.
Mix Ingredients Thoroughly
Thoroughly mix the ingredients like canned salmon, oat flour, and eggs in a stand mixer for a uniform consistency. Here's how to master this step:
- Set your stand mixer to a medium speed to guarantee even blending.
- Scrape down the sides of the bowl periodically to integrate all the ingredients.
- Mix until the dough forms a cohesive ball and pulls away from the sides.
- Pay attention to the texture; it should be slightly sticky but workable.
Shape Into Small Balls
For a smooth consistency in your homemade dog training treats, make sure you knead the dough well when shaping it into small balls.
Kneading the dough helps distribute ingredients evenly and creates a cohesive texture in the treats.
When shaping the dough into small balls, aim for uniformity in size and shape to guarantee even cooking and portion control.
Small balls are ideal for training as they offer quick, bite-sized rewards for your dog.
Properly shaped small balls are easier to handle and dispense during training sessions.
Bake Until Golden
When baking the dough until golden for your homemade dog training treats, make sure you knead it to the desired consistency for best texture and flavor. Here are some tips to help you get the perfect dough for your pup's treats:
- Kneading evenly distributes ingredients for consistent texture.
- Proper kneading guarantees a smooth, lump-free dough.
- Kneading activates gluten, providing structure and elasticity.
- Knead until the dough reaches the appropriate consistency for shaping and cutting.
Shape the Treats

To shape the treats, you can use cookie cutters to create distinct shapes that appeal to your dog. Alternatively, you can roll the dough into small balls for a more straightforward approach.
Experiment with different shapes and sizes to find what works best for your training sessions.
Use Cookie Cutters
Want to add a touch of creativity to your homemade dog training treats? Using cookie cutters is a fantastic way to shape your treats into fun and engaging forms for your furry friend. Here are some tips to make the most out of this technique:
- Cookie cutters offer a variety of shapes and sizes, perfect for customizing treats.
- Creating shapes like bones, hearts, stars, or paw prints adds a playful element to your homemade puppy training treats.
- Consistency in treat sizes guarantees uniformity, perfect for positive reinforcement during training.
- Involving the family in using cookie cutters can turn treat-making into a fun and enjoyable activity for everyone.
Roll Into Balls
Shaping homemade dog training treats into balls guarantees consistent portion sizes for effective rewards during training sessions. By rolling the treats into uniform balls, you make it easier to control the amount you give to your dog during training. This shaping technique not only guarantees that your dog receives the right portion but also makes the treats easy to handle and quick for your pet to consume. It's a simple yet effective way to enhance your training sessions and keep your dog motivated. Below is a table highlighting the benefits of rolling homemade dog training treats into balls:
| Benefits of Rolling into Balls | |
|---|---|
| Creates uniform portion sizes | Easy for dog to consume quickly |
| Enhances handling during training | Visually appealing and motivating |
Bake Until Golden Brown

Bake your homemade dog training treats until they turn a delightful golden brown for that perfect crunch your furry friend will love. Here's what you need to know about achieving that ideal bake:
- Crunchy Texture: Baking until golden brown creates a satisfyingly crunchy texture that dogs find irresistible during training sessions.
- Proper Baking Time: Ensuring the treats are baked for the correct amount of time is essential. This will help you achieve that golden brown color and the desired crunchiness.
- Appealing Aroma: Golden brown treats not only look good but also emit an enticing aroma that can capture your dog's attention and make training more effective.
- Avoid Overbaking: Be mindful not to overbake the treats, as this can result in them becoming excessively hard and less enjoyable for your canine companion.
Cool and Store Properly

For high-quality freshness and longevity of your homemade dog training treats, make sure they are cooled completely before storing in an airtight container. Cooling treats before storage helps prevent condensation, which can lead to mold growth and spoilage. To guarantee your treats stay fresh and tasty for your furry friend, follow these steps for proper storage:
| Steps | Instructions | Importance |
|---|---|---|
| Cool treats completely | Allow treats to cool to room temperature before storing in an airtight container. | Prevents condensation and mold growth. |
| Store in an airtight container | Transfer cooled treats to an airtight container to maintain freshness and prevent spoilage. | Preserves the quality of the treats. |
| Label containers | Label containers with treat names and dates to track freshness and ensure timely consumption. | Helps in identifying and rotating treats efficiently. |
| Rotate treats regularly | Use older batches first and rotate treats regularly to maintain a continuous supply of fresh training treats. | Ensures treats are consumed before expiration. |
Training Tips for Treat Usage

To improve your dog's training sessions effectively, select small, tasty, and low-calorie treats. Here are some tips for using treats in your dog's training:
- Variety is Essential: Keep your dog engaged by offering different types of treats during training sessions. This prevents boredom and helps maintain motivation.
- Homemade is Ideal: Creating your own treats guarantees they're simple to make, adored by your dog, and don't crumble during training. Additionally, it's a cost-effective and soothing activity for you.
- Ingredient Management: By creating homemade treats, you know precisely what goes into them, ensuring their quality and healthiness for your furry friend.
- Consistency is Vital: Use the same type of treat throughout a training session to maintain focus and avoid confusion. Uniform rewards help reinforce desired behaviors effectively.
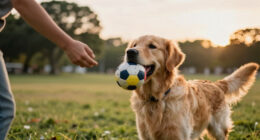
Enjoy Training With Homemade Treats

When engaging in dog training with homemade treats, you are providing a healthy and customizable reward option for your furry companion. Making homemade puppy treats for training is not only a fun activity but also guarantees that your dog loves the rewards they receive. These treats are easy to make and can be customized to suit your dog's preferences, making training sessions more enjoyable for both of you. By using high-quality ingredients in your homemade treats, you are not only rewarding your dog but also providing them with additional nutritional benefits that contribute to their overall health and well-being.
| Benefits of Homemade Dog Training Treats | |
|---|---|
| Cost-effective | Healthy option |
| Customizable ingredients | Tailored to dog's taste |
| Control over dietary needs | Nutritional benefits |
Enjoy the training process with your furry friend by incorporating these homemade treats into your routine.
Frequently Asked Questions
How Do You Make Small Dog Training Treats?
To make small dog training treats, combine ingredients like peanut butter, oats, and flour. Mix, shape into bite-sized treats, and bake. Consistency in size and taste is key. Use them as quick rewards for training sessions to reinforce good behavior effectively.
What Do Most Dog Trainers Use for Treats?
Most dog trainers use small, soft, and aromatic treats to maintain your dog's focus during training. Opt for high-value treats like bits of cooked chicken or freeze-dried liver for teaching new commands. Consistency in treat quality is key.
How to Make High-Value Dog Training Treats?
To make high-value dog training treats, combine ingredients like cheese or bacon, shape into small pieces, and bake until crispy. Tailor treats to your dog's taste for best results. Your pup will be motivated and attentive during training sessions!
What Is the Best Food to Use as Training Treats for Dogs?
For dog training treats, opt for small, soft, and irresistible options. High-value treats keep your pup focused. Avoid large or hard treats that slow progress. Choose low-calorie, natural treats for your dog's well-being.
Can the Homemade Dog Training Treats also be used for Small Dogs?
Yes, homemade dog training treats can also be used for small dogs. By following a small dog training treats tutorial, you can customize the treats to fit the size and dietary needs of your little pup. Using homemade treats ensures that your small dog gets healthy and delicious rewards during training.
Conclusion
To summarize, homemade dog training treats are a straightforward and efficient way to reward your furry friend during training sessions. By following these simple steps, you can create delicious treats that will inspire your dog to learn new commands and behaviors.
Remember to use positive reinforcement and consistency in your training approach. With these homemade treats, you can strengthen the bond with your dog and make training sessions enjoyable for both of you.
Happy training!