
If your night wildlife footage looks bad, start by checking your IR settings. Make certain the IR brightness and range are properly adjusted to avoid overexposure or darkness. Proper camera placement and IR calibration are also essential to get clear, sharp images. Confirm your IR filter is compatible and clean. Fine-tuning these settings can greatly enhance your footage, and there’s more to explore for different wildlife conditions and environments.
Key Takeaways
- Check and adjust IR brightness and contrast to improve image clarity and reduce overexposure.
- Ensure IR filter compatibility and cleanliness to prevent grainy, noisy footage.
- Properly calibrate IR intensity and wavelength for optimal scene illumination.
- Optimize camera placement and angle to maximize IR coverage and avoid overexposure.
- Conduct test footage and fine-tune IR settings based on wildlife size, distance, and environment conditions.
Why Is My Night Wildlife Footage Poor? Common Causes

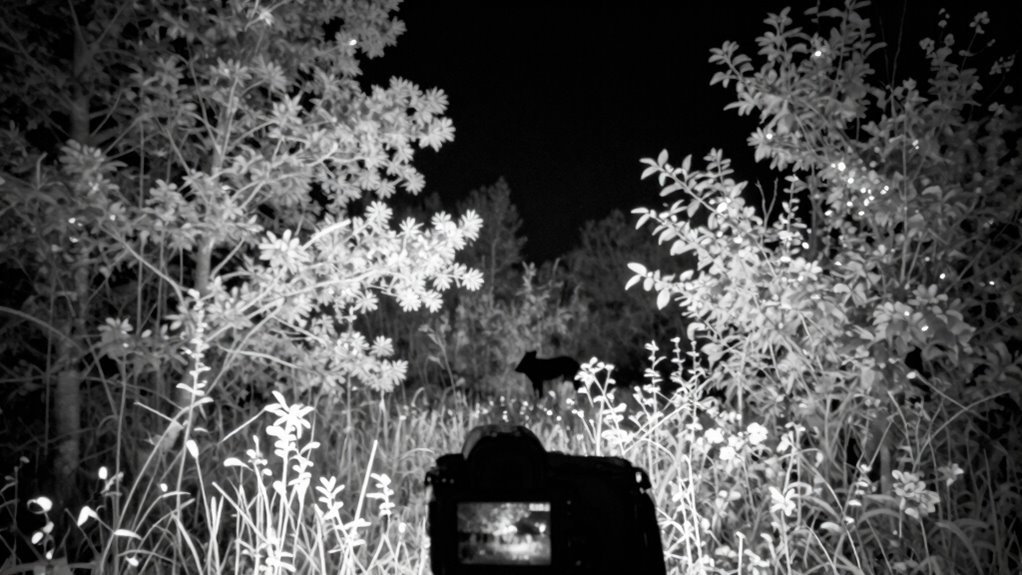
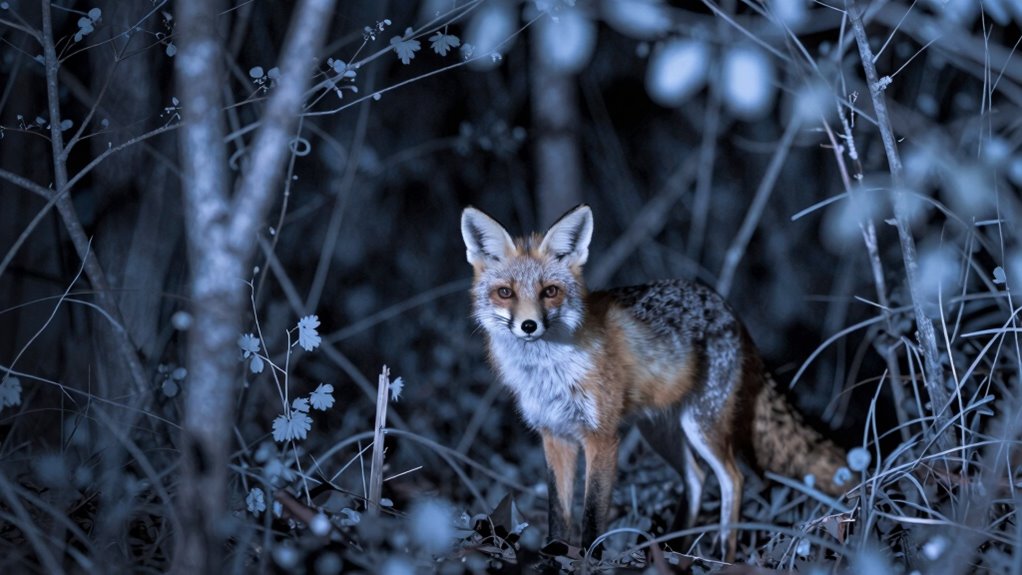
Poor night wildlife footage often results from incorrect IR (infrared) settings or inadequate camera setup. One common mistake is poor camera placement, which can scare animals away or miss critical wildlife behavior. If your camera is too close, the IR light might overexpose the shot, while placing it too far can result in dim footage. Additionally, ignoring natural wildlife behavior—like their preferred movement times or hiding spots—can cause gaps in footage. Misjudging where animals are likely to appear leads to missed shots and poor footage quality. Adjusting your camera placement to blend into the environment and observing wildlife patterns helps improve results. Proper setup ensures you capture authentic behavior, making your night footage clear and more engaging. Utilizing energy-efficient cloud solutions to store and analyze your footage can also enhance your wildlife observation experience. Understanding contrast ratio and how it affects image clarity can help you fine-tune your camera’s night settings for sharper results. Focusing on camera calibration ensures your IR settings are optimized for the best possible image quality in low-light conditions.
What Does IR Lighting Do for Night Camera Performance?
IR lighting boosts your night camera’s visibility, allowing you to see more details in low-light conditions. It also sharpens image clarity and minimizes noise artifacts that can obscure your footage. Understanding how IR affects performance helps you capture clearer, more reliable wildlife footage after dark. Additionally, proper IR settings optimization ensures your camera captures the best possible images without overexposure or loss of detail. Adjusting these settings can significantly enhance your footage quality, and knowing the impact of IR on image quality guides better camera configuration. Using the right IR illumination type further improves your footage by providing consistent lighting suited to your specific environment. Being aware of IR light wavelength helps in choosing the most effective lighting for your camera setup.
Enhances Night Visibility
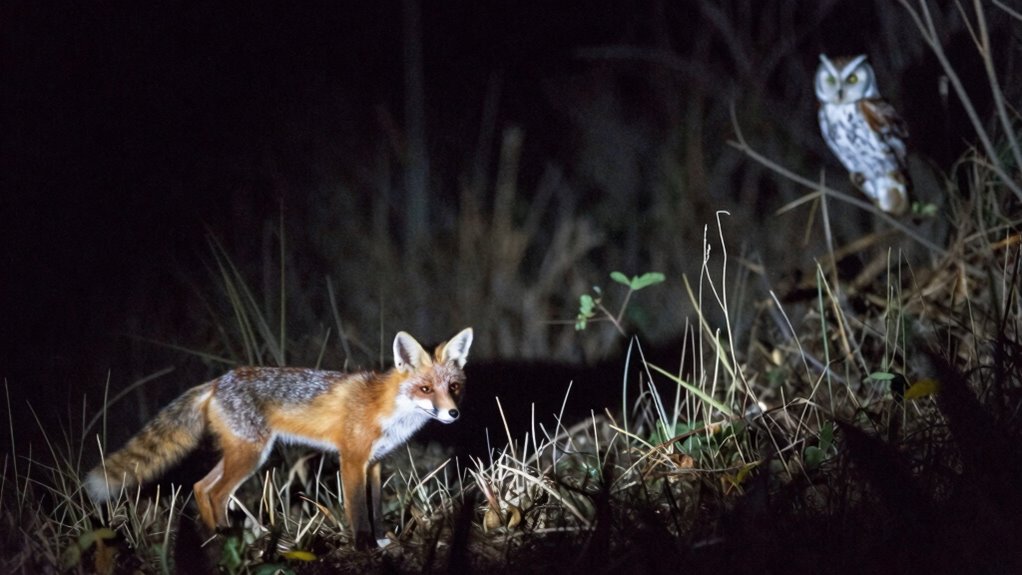
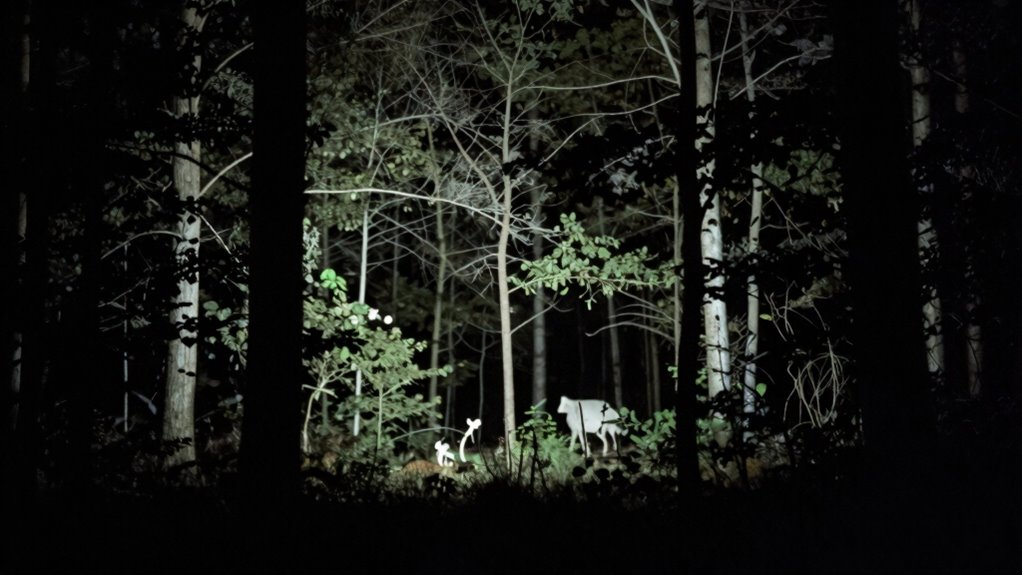
When you switch on IR lighting, your night camera immediately gains the ability to see in darkness by illuminating the scene with infrared light that’s invisible to the human eye. This infrared spectrum enhances night visibility, allowing your camera to detect objects and movement that would otherwise be hidden. IR lighting boosts your camera’s sensitivity to low-light conditions, resulting in clearer, more detailed footage without the need for visible light sources. It works by providing consistent illumination, ensuring your camera captures more accurate images in total darkness. Proper IR settings optimize this process, helping you achieve better night wildlife footage. By understanding how IR enhances night visibility, you ensure your camera performs reliably during nocturnal hours. Adjusting IR settings is essential for minimizing noise and glare, further improving footage quality in low-light environments.
Improves Image Clarity
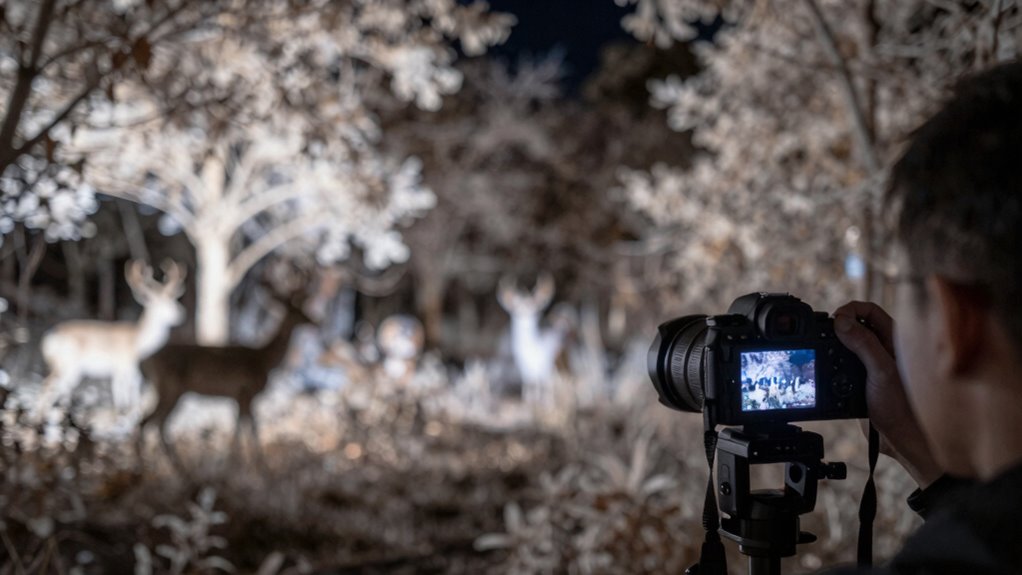
Infrared lighting considerably enhances image clarity during nighttime filming by reducing noise and improving detail sharpness. Proper IR LED calibration ensures your camera emits the right amount of IR light, preventing overexposure or underexposure that can blur details. Accurate calibration allows for sharper, more accurate images, capturing fine textures and subtle movements. Additionally, wildlife camera placement plays a vital role; positioning your camera correctly guarantees maximum IR illumination coverage of your target area. When IR LEDs are calibrated properly and the camera is strategically placed, your footage will display clearer images with better contrast and detail, even in complete darkness. This combination minimizes blurriness and enhances the overall sharpness of your night wildlife footage, making it easier to identify and analyze animals. IR LED calibration is also important for maintaining consistent image quality in various lighting conditions.
Reduces Noise Artifacts
Proper IR lighting markedly reduces noise artifacts in night wildlife footage by providing consistent, targeted illumination that minimizes the need for high ISO settings. When you use infrared spectrum lighting, your camera can capture clearer images with less electronic noise, resulting in smoother footage. This is especially important because high ISO amplifies noise, which degrades image quality. By carefully adjusting IR lighting, you ensure your camera stays within ideal sensitivity levels. Additionally, reliable IR illumination helps you observe wildlife behavior more accurately without startling animals or losing detail in shadows. Overall, reducing noise artifacts through proper IR settings enhances footage quality, making your night recordings look sharper, cleaner, and more professional.
How Can I Check and Adjust My Camera’s IR Settings?
To check and adjust your camera’s IR settings, start by accessing the camera’s menu or control panel. Look for options related to IR calibration, which guarantees the infrared illumination is properly aligned for clear night footage. First, verify the IR intensity and range, adjusting them if necessary to avoid overexposure or underexposure. Proper camera positioning is essential—make sure the camera is aimed correctly at your subject, with no obstructions that could interfere with IR illumination. Use the camera’s live preview to fine-tune settings, checking how IR light interacts with the scene. Small adjustments in IR sensitivity and camera angle can considerably improve night footage quality, reducing glare and improving clarity. Regularly reviewing and tweaking these settings helps achieve sharper, more natural night wildlife footage. Additionally, understanding infrared light behavior can help you better interpret how IR adjustments influence your footage.
How Do I Set the IR Range for Clearer Night Shots?
Adjusting the IR range on your camera helps make sure you get clear, well-lit night shots without unnecessary glare or darkness. To do this, focus on infrared calibration, which ensures your IR beamwidth matches your scene. Start by adjusting the IR range setting on your camera—this controls how far the IR illuminates. If your footage appears too dark, increase the IR range; if it’s overly bright or glarey, decrease it. Experiment with the IR beamwidth to narrow or widen the IR light spread, depending on your scene’s size. Proper calibration helps optimize IR coverage, giving you clearer, more natural night shots. Additionally, understanding your camera’s IR power settings can help you better tailor the illumination to your specific scene conditions. Adjusting the IR frequency may also improve image quality by reducing flickering or noise in your footage, especially under fluctuating lighting conditions. Regularly checking the IR alignment ensures the IR light is properly aimed, which is crucial for consistent night footage. Fine-tuning the IR settings based on infrared calibration can further enhance image clarity and reduce unwanted artifacts. Always test adjustments in the field, and fine-tune until you achieve consistent, sharp footage with minimal glare.
How Do I Balance IR Brightness to Avoid Overexposure or Darkness?
To get the best night wildlife footage, you need to carefully adjust the IR brightness, so your images aren’t overexposed or too dark. Using test shots helps you find the right balance quickly and effectively. Keep tweaking the settings until your footage looks natural and clear. Understanding camera settings can further enhance your ability to capture high-quality footage in low light conditions. Additionally, knowing about night vision technology can help optimize your IR settings for better clarity and detail.
Adjust IR Brightness
Balancing IR brightness is crucial for capturing clear wildlife footage without overexposure or darkness. To achieve this, adjust the IR lighting intensity based on your camera’s infrared calibration. Start by increasing IR brightness until the scene is well-lit without washing out details—then gradually decrease it if the footage begins to overexpose. Conversely, if the scene appears too dark, subtly boost IR lighting levels. Keep an eye on the image’s exposure to prevent blown-out highlights or underexposure. Some cameras allow manual IR brightness adjustments, while others require you to modify IR LED power settings. Regularly review test footage to fine-tune IR lighting, ensuring your infrared calibration aligns with your camera’s capabilities and outdoor lighting conditions for maximum night wildlife footage. Additionally, understanding the thermal behavior of your IR setup can help optimize image quality in varying environments.
Use Test Shots
Using test shots is essential for finding the right IR brightness level that prevents overexposure or darkness in your wildlife footage. Start by adjusting your camera placement to observe how different angles affect IR illumination. Take multiple test shots of the same scene to see how varying IR brightness impacts the image. Pay close attention to wildlife behavior; if animals appear too bright or too dark, tweak your settings accordingly. This process helps you identify the ideal balance where animals are clearly visible without washed-out highlights or shadows. Remember, wildlife can be unpredictable, so frequent testing ensures your IR setup adapts to their activity and lighting conditions. Doing these tests saves time and guarantees more consistent, high-quality footage.
Troubleshooting IR Problems That Make Night Footage Grainy or Noisy

When infrared (IR) settings aren’t properly adjusted, night footage can become grainy or noisy, making it hard to capture clear wildlife images. One common cause is mismatched infrared filters, which can let in too much or too little IR light, degrading image quality. To troubleshoot, check if your IR filters are compatible with your camera and ensure they’re clean and properly positioned. Noisy footage often results from insufficient IR illumination or incorrect exposure settings, which can also affect how animals behave around your camera. Adjust the IR brightness and contrast to improve clarity. Remember, understanding wildlife behavior helps you set the right IR range; some animals are more active under specific IR conditions, influencing your camera’s configuration for ideal night footage. Additionally, proper home and small-shop power management can ensure your camera’s IR system receives consistent power, reducing operational issues during night recordings.
How Can I Test and Fine-Tune IR Settings in the Field?
To effectively test and fine-tune your IR settings in the field, start by capturing test footage under current conditions. Observe how the infrared spectrum affects visibility and how wildlife behavior appears at night. Use this footage to identify issues like overexposure or poor contrast.
Adjust your IR intensity and wavelength based on these observations:
| IR Intensity | Wavelength | Result |
|---|---|---|
| Low | Narrow | Less glow, subtle IR details |
| Medium | Broad | Balanced visibility |
| High | Wide | Bright IR glow, potential glare |
Repeat this process until your footage accurately captures wildlife behavior without excessive glare or graininess. Field testing guarantees your IR settings are optimized for real-world conditions.
What Are the Best IR Settings for Different Wildlife and Lighting Conditions?
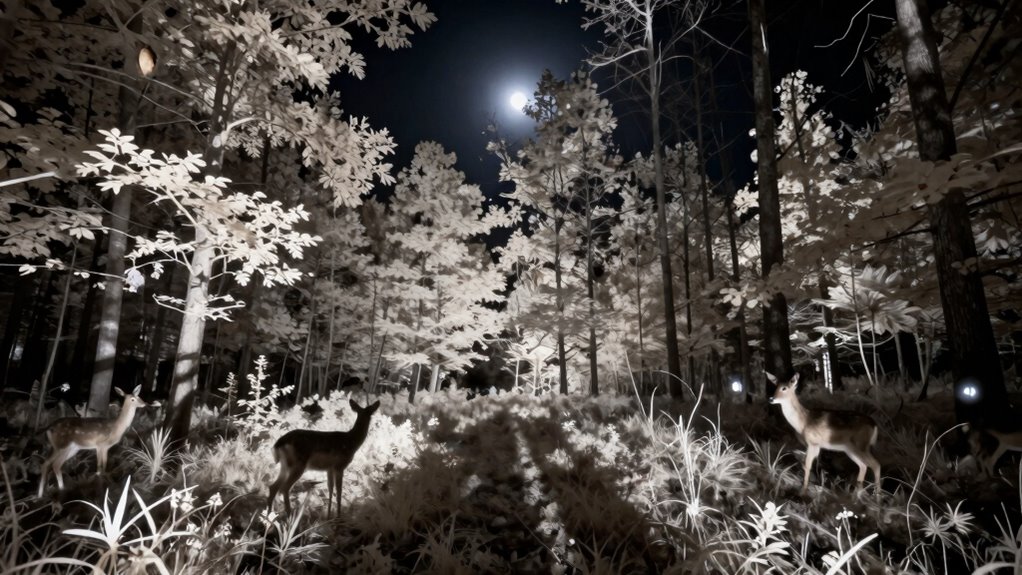
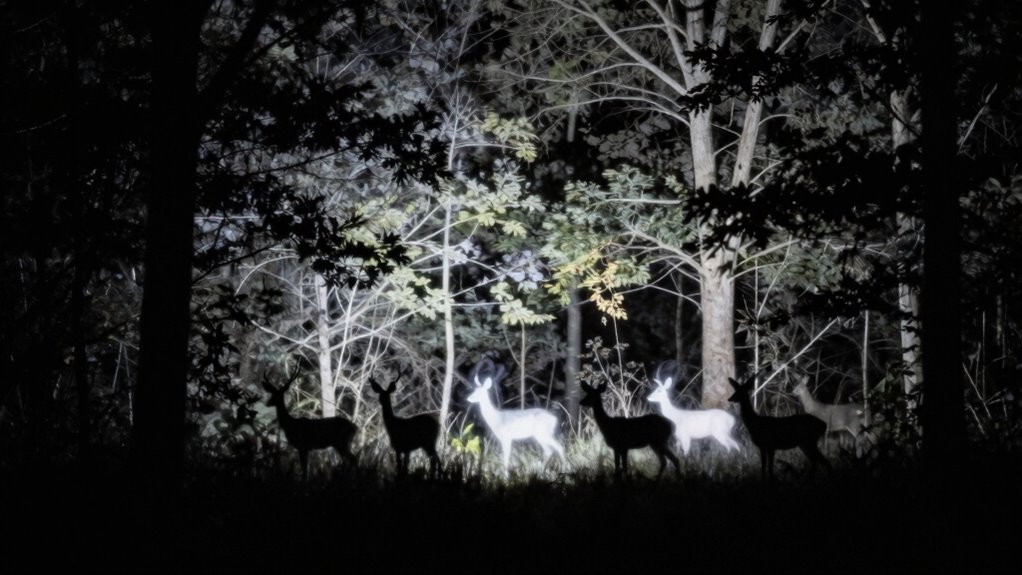
Choosing the right IR settings depends on the specific wildlife you’re filming and the ambient lighting conditions. Adjusting infrared illumination guarantees clear footage without overexposure or darkness. For low-light environments, increase IR intensity to capture hidden activity. When filming larger animals or in open areas, set the IR range higher for broader coverage. Conversely, for small or shy wildlife, lower IR levels help avoid startling them. Proper wildlife camera placement also influences IR effectiveness, as positioning near natural cover minimizes disturbance. Also, understanding power backup tips can ensure your camera remains operational during outages. Keep these tips in mind:
Adjust IR settings based on wildlife size, distance, and camera placement for optimal night footage.
- Use higher infrared illumination for distant or larger wildlife
- Lower IR settings for discreet, close-up shots
- Adjust IR based on wildlife camera placement and environment
Fine-tuning these settings ensures excellent night footage in varied wildlife and lighting conditions.
How Proper IR Setup Enhances Your Night Wildlife Viewing Experience
Proper IR setup is essential for capturing clear and detailed night wildlife footage, as it directly influences what you see and record. When your infrared spectrum settings are optimized, you gain a better view of subtle wildlife behavior that might otherwise go unnoticed. Correct IR calibration reduces glare and enhances contrast, making animals more visible and natural-looking. This calibration process is a key aspect of art care, ensuring that your equipment functions optimally for wildlife observation. Regularly checking and adjusting your IR settings can prevent equipment malfunctions that compromise image quality. Additionally, understanding infrared spectrum properties helps in fine-tuning your device for different environmental conditions, leading to more accurate recordings. Proper IR setup also involves understanding how infrared light interacts with various surfaces and animals, which can improve your footage quality. This allows you to observe nocturnal activity more accurately and with greater detail. Proper setup also minimizes disturbance to wildlife, since well-adjusted IR illumination appears less intrusive. By fine-tuning your IR parameters, you create a more authentic viewing experience, helping you understand animal habits and interactions in their natural environment. Ultimately, a proper IR setup ensures your night wildlife viewing is more immersive, informative, and rewarding.
Frequently Asked Questions
How Do IR Settings Affect Night Wildlife Footage Quality?
Your IR settings directly impact night wildlife footage quality by affecting infrared calibration, which determines how well your camera captures low-light details. Proper IR calibration guarantees clearer images, minimizing noise and ghosting. Adjusting these settings also helps you better observe wildlife behavior without disturbing animals. When you optimize IR settings, your footage becomes sharper, more natural, and accurately represents nighttime activity, giving you a better overall viewing experience.
Can Incorrect IR Calibration Cause Color Distortion?
Yes, incorrect IR calibration can cause color distortion in your night wildlife footage. When your IR settings aren’t properly calibrated, the camera may emit uneven infrared light, leading to inaccurate color reproduction. This affects color accuracy, making scenes look unnatural or washed out. To fix this, double-check your IR calibration and verify the infrared illumination is balanced. Proper calibration helps maintain true colors and improves overall footage quality.
What Tools Are Best for Testing IR Performance in the Field?
Did you know that over 60% of wildlife photographers use specialized tools to test IR performance in the field? To do this effectively, you should carry camera accessories like infrared testers or light meters designed for IR calibration. These tools help you analyze IR illumination and make certain your footage is clear, allowing you to capture authentic wildlife behavior without distortion. Proper testing keeps your night footage sharp and true to nature.
How Often Should IR Settings Be Rechecked During Filming?
You should recheck your IR settings regularly during wildlife observation, ideally every few hours or whenever lighting conditions change considerably. Consistent Infrared calibration guarantees clear, accurate night footage and prevents issues like overexposure or underexposure. Frequent checks help you maintain peak IR performance, capturing better wildlife footage in low light. Keep an eye on your footage’s quality and adjust IR settings as needed for the best results.
Are There Specific IR Configurations for Different Animal Types?
Yes, there are animal-specific IR configurations that can improve your night vision footage. You should adjust Infrared calibration for different species, considering their size and behavior. Using animal-specific IR settings helps maximize night vision, reducing glare and enhancing clarity. Employ targeted IR lighting techniques tailored to each animal type, ensuring better visibility. Regularly recheck these settings during filming to maintain peak night wildlife footage quality.
Conclusion
By fine-tuning your IR settings, you can turn your grainy, poorly lit night wildlife footage into clear, vibrant scenes that even a knight from King Arthur’s court would envy. Don’t forget to test and adjust your IR range and brightness regularly, just like a trusty squire would maintain a noble steed. With proper setup, your nocturnal adventures will shine brighter than Excalibur, revealing nature’s mysteries in stunning detail—no magic required.